| last
updated 01/18/24 |
|
Welcome to the SSV Community Web Page onMaking a Large Image Safe Solar Viewer (LISSV)At the time of the August 2017 total
solar eclipse I was contacted by a number of individuals
wishing to make an SSV projecting a solar image up to 16
inches in diameter. At the time I was swamped with
queries and conducting workshops for children with the
1-lens and 2-lens SSVs. I managed to get enough
information out to those individuals to help them make a
Large Image Safe Solar Viewer (LISSV) but did not post
the results on the web. Since then I have evaluated the
lenses available to make such viewers and have tested
some of them in in solar observing. First, a LISSV will
have to be longer than a normal SSV to get the large
image size. Second, a larger objective will be necessary
so that the image brightness is sufficient for proper
viewing. With the rule of thumb that an image should be
no more than about 4 times the objective diameter, a
LISSV producing a 16 inch image would require an object
with a diameter of 4 inches (100 mm) and a solar image
size of a foot requires an objective of 3 inches (75
mm). |
|
|
Choosing the Objective
|
|
|
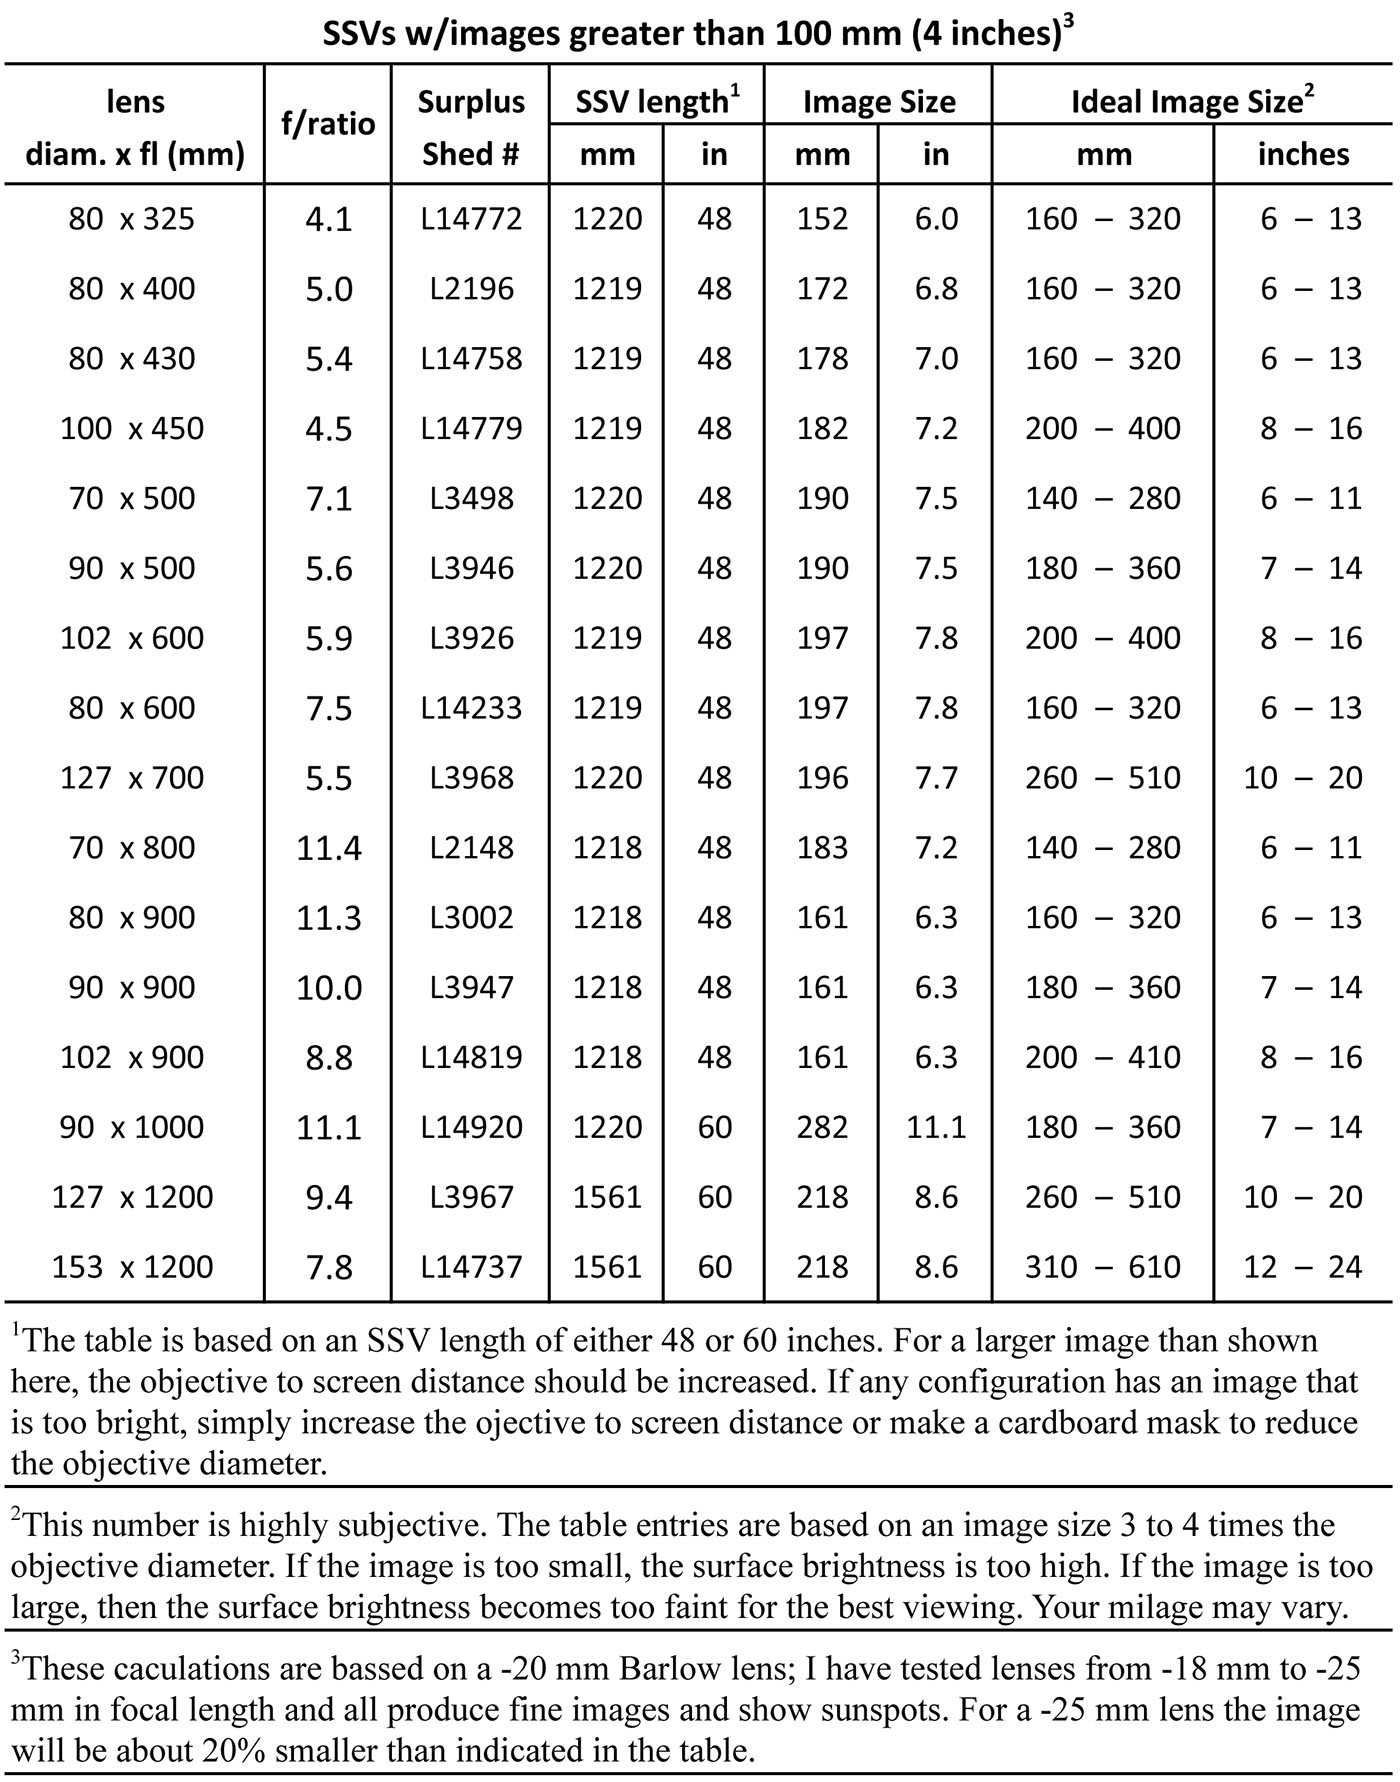
The objective lens needs to be of
sufficient size and focal length to do the job. Usually,
since the larger an objective the higher the price, to
control costs it might be best to select the smallest
diameter lens that will produce your desired image size.
The sizes noted here are suggestions and not the result
of any rules of optics. For comparison, the image sizes
listed are based on a fixed objective to screen distance
of 48 or 61 inches. A shorter distance will give a
smaller solar image while a greater distance yields a
larger one. If the distance is too short, image
formation cannot be achieved. |
|
 |
|
|
The Barlow Lens
|
|
|
For a choice of Barlow lens, a focal
length between -18 mm and -26 mm has worked best for our
large image viewers. As to the diameter of the lens,
that parameter depends on the focal length of the
objective. The light from the Sun will, on entering the
Barlow, be reduced to a bundle of rays with a diameter
of about a hundredth the focal length of the objective.
So for the 80 mm by 325 mm where that bundle is less
than 4 mm, a Barlow 10 mm in diameter is a fine choice.
Now for the 153 mm by 1200 mm objective a 15 mm diameter
might not be enough but 20 mm should work well. |
|
|
Image Screen Surface
|
|
|
With a larger solar image it is
important for the projection surface to be perpendicular
to the optical axis and as flat as possible. Copier
paper will ripple. With the regular SSV we have used
heavy card stock and others in the community have been
successful with poster board. We have tried a sheet of
AV projection screen material with adhesive backing. It
required skill that we did not have. We simply could not
get the sheet to adhere to smooth plywood without
bubbles or ripples. We think white card stock or poster
board works well. |
|
| Back to the
Main Page |
|